
How to Create a Clothing Size Chart: Which Measurements Should Your Brand Use?
Your first hoodie order arrives.
You measure the Large.
The chest is wider than the approved sample.
Then you measure the Medium.
It is almost the same size as the Small.
Customers start asking:
“Which size should I buy?”
The factory checks the tech pack and finds another problem.
The chart says:
Chest: 60 cm
but it does not explain:
- Whether 60 cm is body chest or garment chest
- Whether it is measured flat or around the body
- Where the tape starts
- Whether there is an allowed tolerance
At that point, the problem is no longer just sewing.
The specification itself is unclear.
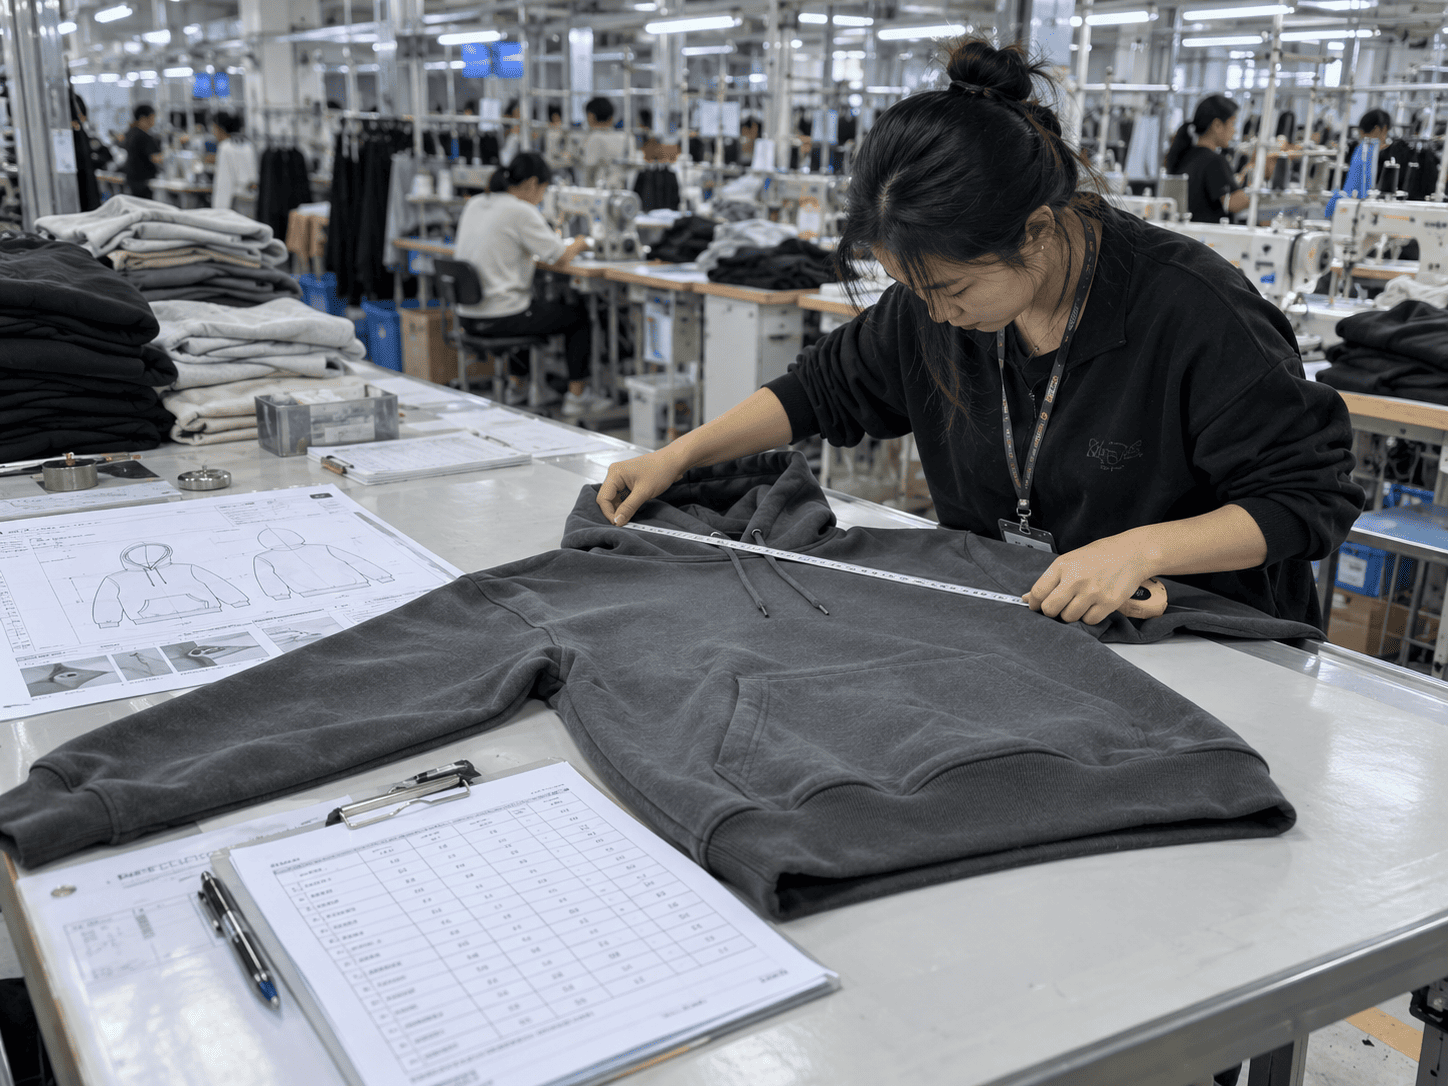
A useful clothing size chart separates body measurements from finished-garment measurements. The customer needs body measurements to choose a size, while the factory needs a garment measurement chart with clear Points of Measure (POM), grading, measuring methods, and tolerances to make and inspect the product consistently.
There is no single universal:
S / M / L / XL
measurement system that every clothing brand must use.
The ISO 8559-1 standard on anthropometric body measurement[^1] defines standardized body-measurement concepts that clothing professionals can use when developing size and shape profiles.
The newer ISO 8559-2:2025[^2] then focuses on clothing size designation using primary and secondary body dimensions.
That distinction is important.
Your customer's body measurements are one system.
Your finished garment measurements are another.
The relationship between them creates the fit.
Table of Contents
- What Is the Difference Between a Body Chart and a Garment Chart?
- Which Measurements Should Each Product Include?
- How Do You Choose a Base Size and Grade the Range?
- What Tolerances Should You Set?
- How Should a Garment Be Measured?
- How Does a Factory Use Your Size Chart?
- Conclusion
What Is the Difference Between a Body Chart and a Garment Chart?
This is one of the most common mistakes I see from new clothing brands.
They send a factory a chart that says:
Chest: 110 cm
but nobody knows whether that number describes:
the customer
or:
the hoodie.
A body size chart describes the dimensions of the person a size is intended to fit. A garment measurement chart describes the actual finished garment. The difference between those two sets of measurements creates ease, compression, or the intended silhouette.
Body Chart
A body chart may include:
- Chest / bust
- Waist
- Hip
- Height
- Inseam
depending on the product.
For example:
| Size | Body Chest | Body Waist | Body Hip |
|---|---|---|---|
| S | 88 cm | 72 cm | 94 cm |
| M | 94 cm | 78 cm | 100 cm |
| L | 100 cm | 84 cm | 106 cm |
These numbers describe:
the person.
They do not tell the factory the exact width of the finished hoodie.
Garment Chart
The garment chart may instead say:
| Size | Half Chest | Body Length | Shoulder | Sleeve |
|---|---|---|---|---|
| S | 56 cm | 70 cm | 55 cm | 58 cm |
| M | 59 cm | 72 cm | 57 cm | 59 cm |
| L | 62 cm | 74 cm | 59 cm | 60 cm |
These describe:
the finished garment.
Ease Connects the Two
Imagine the customer's body chest is:
94 cm
and the oversized hoodie measures:
118 cm around the chest
or:
59 cm half chest laid flat.
The hoodie has extra room because the design is intentionally oversized.
Now imagine compression leggings.
The garment waist may be smaller than the body waist because the fabric stretches.
That is:
negative ease.
So:
Body measurement
- design intent
- fabric behavior
= garment measurement.
That is why copying a random internet size chart is risky.
ISO Size Designation Is Based on the Body
ISO 8559-2:2025[^2] establishes clothing-size designation based on primary and secondary body dimensions.
That does not mean every brand must replace:
S / M / L
with ISO numbers on its website.
It means the technical logic should begin with:
Who is this size intended to fit?
before deciding:
How large should the garment itself be?
Should Customers See Both Charts?
For some products, yes.
A body chart helps a customer understand:
which size fits my body?
A garment chart helps them compare:
how does this hoodie compare with one I already own?
That is especially useful for:
- Oversized hoodies
- Boxy tees
- Relaxed shirts
- Wide-leg trousers
because customers care about the finished silhouette.
Which Measurements Should Each Product Include?
Not every product needs the same measurement points.
A hoodie and a legging may both be size M.
But their POM lists are completely different.
Choose measurement points that control the garment's fit, proportion, and function. The factory needs enough POMs to reproduce the approved design, but adding dozens of unnecessary measurements can make the specification harder to manage.
T-Shirts
Typical POMs include:
- Half chest
- Body length
- Shoulder
- Sleeve length
- Sleeve opening
- Neck width
- Front neck drop
- Bottom width
For an oversized tee, you may pay particular attention to:
- Shoulder drop
- Chest
- Sleeve opening
- Body length
because those measurements define the silhouette.
Hoodies and Sweatshirts
Useful points may include:
- Half chest
- Body length
- Shoulder
- Sleeve length
- Bicep
- Cuff width
- Bottom opening
- Rib height
- Hood height
- Hood width
- Pocket width
- Pocket height
For a zip hoodie, add:
- Zipper length
Joggers and Sweatpants
Typical points include:
- Waist relaxed
- Waist stretched
- Hip
- Front rise
- Back rise
- Thigh
- Knee
- Inseam
- Outseam
- Leg opening
- Cuff height
Stretch waistbands deserve special attention.
One number is usually not enough.
Why Measure the Waist Relaxed and Stretched?
Suppose a jogger waistband measures:
36 cm flat relaxed
but only stretches to:
41 cm.
It may technically match the relaxed specification.
But it may be impossible for the intended customer to pull over the hips.
So for elastic waists, consider specifying:
- Relaxed waist
- Stretched waist or minimum stretch requirement
Leggings
Typical measurements include:
- Waist
- Hip
- Front rise
- Back rise
- Thigh
- Knee
- Inseam
- Leg opening / ankle
But garment measurements alone are not enough for compression styles.
You also need to understand:
- Fabric stretch
- Recovery
- Intended negative ease
Sports Bras
Possible measurements include:
- Underband relaxed
- Underband stretched
- Front length
- Back length
- Strap width
- Strap length
- Armhole
- Cup or bust-related dimensions where relevant
A high-support sports bra normally needs more construction control than a simple crop top.
Jeans and Woven Pants
Important points can include:
- Waist
- Hip
- Front rise
- Back rise
- Thigh
- Knee
- Inseam
- Outseam
- Leg opening
- Waistband height
Because woven fabric has less forgiveness than stretch knitwear, small measurement differences may be more noticeable.
Do Not Add POMs Just to Make the Tech Pack Look Professional
A chart with 45 measurements is not automatically better than one with 18.
Every POM should answer:
If this measurement changes, will the customer notice the fit or construction difference?
If yes, it probably belongs in the chart.
How Do You Choose a Base Size and Grade the Range?
A size range is normally not created by independently designing every size.
You begin with a base size and build the surrounding sizes through grading.
The base size should represent the body and fit you want to develop first. There is no rule that every unisex brand must use M or every women's brand must use S. Once the base fit is approved, each POM is graded up and down using increments appropriate to that measurement and target customer.
Base Size Is a Brand Decision
Many brands use:
- M for unisex
- S or M for women's apparel
because those sizes may sit near the middle of their range.
But this is not an international rule.
A brand targeting a different population could choose another base size.
The important thing is that you have:
- Suitable fit model
- Clear body measurements
- Approved garment measurements
for the chosen base.
Grading Does Not Mean Adding the Same Number Everywhere
Suppose you are grading an oversized hoodie:
| POM | S | M | L | XL | Example Step |
|---|---|---|---|---|---|
| Half chest | 56 | 59 | 62 | 65 | +3 cm |
| Body length | 70 | 72 | 74 | 76 | +2 cm |
| Shoulder | 55 | 57 | 59 | 61 | +2 cm |
| Sleeve | 58 | 59 | 60 | 61 | +1 cm |
This is an example only.
It is not an industry standard.
Notice that:
chest, length, shoulder, and sleeve do not use the same grade.
That is normal.
Grading Should Follow the Target Population
ISO 8559-3:2018[^3] provides methodology for creating body-measurement tables and size intervals for ready-to-wear clothing.
Its purpose is to support more accurate development of well-fitting garments for defined population groups.[^3]
That is a better way to think about grading than:
“Every measurement increases 2 cm per size.”
Extended Sizes May Need Different Grade Rules
As the size range gets wider, the same grading logic may no longer work well.
For example:
XS–XL
may use one set of grading increments.
2XL–4XL
may need adjustments to:
- Chest
- Hip
- Bicep
- Rise
- Shoulder
- Sleeve length
depending on the body profile and garment.
Sometimes a second base block is useful.
But that should be decided from the target size system and fit testing.
Not because:
“all plus size must use another pattern.”
Fit-Test the Range Strategically
You do not necessarily need to make every size before bulk.
But for a new style, it can be useful to review:
- Base size
- One smaller size
- One larger size
or another strategic size set.
For a very wide range:
XS–4XL
testing only M gives limited information.
What Tolerances Should You Set?
Sewing is manufacturing.
Manufacturing has variation.
Two garments produced from the same pattern may not measure to the exact millimeter.
Tolerance is the permitted variation from the target garment measurement. It should be assigned by POM according to garment type, fabric behavior, construction, washing, and how sensitive that measurement is to fit. There is no universal tolerance table that applies to every garment.
Example Tolerances
A starting point might look like:
| POM Type | Example Starting Tolerance |
|---|---|
| Small detail: rib height / cuff | ±0.5 cm |
| Shoulder / sleeve opening | ±0.5–1 cm |
| Chest / body width | ±1 cm |
| Body length | ±1 cm |
| Inseam | ±1 cm |
Again:
these are examples, not standards.
Your project may need different tolerances.
Why Not Use ±0.5 cm Everywhere?
It sounds precise.
But on some products it may be unrealistic.
Consider:
- Heavy fleece
- Garment washing
- Stretch rib
- Enzyme wash
- Garment dye
Those processes can introduce more dimensional variation.
A tolerance should reflect what can realistically be controlled while still protecting the intended fit.
Why Not Use Very Wide Tolerances?
Because then sizes can overlap.
Suppose your M half chest is:
59 cm
and L is:
62 cm.
The grade difference is only:
3 cm.
If the M has:
±2 cm tolerance
then an M could measure:
61 cm.
Now it is almost the target measurement of L.
That creates inconsistent sizing.
Tolerance Should Be Set by POM
The neckline may need a tighter tolerance because a small change is visually obvious.
The chest may allow slightly more.
So avoid one statement such as:
“All measurements ±1.5 cm.”
unless you genuinely want that for every point.
Washed Garments Need Special Attention
If a garment goes through:
- Garment dye
- Acid wash
- Enzyme wash
- Stone wash
- Heavy laundering
the final measurements should be checked after the applicable finishing process.
ISO 5077:2007[^5] provides a method for determining dimensional change after specified washing and drying procedures.
The standard remains current after review.[^5]
That is why shrinkage and tolerance should not be treated as unrelated subjects.
How Should a Garment Be Measured?
This is one of the most valuable improvements you can make to a tech pack.
A measurement number without a measurement method is incomplete.
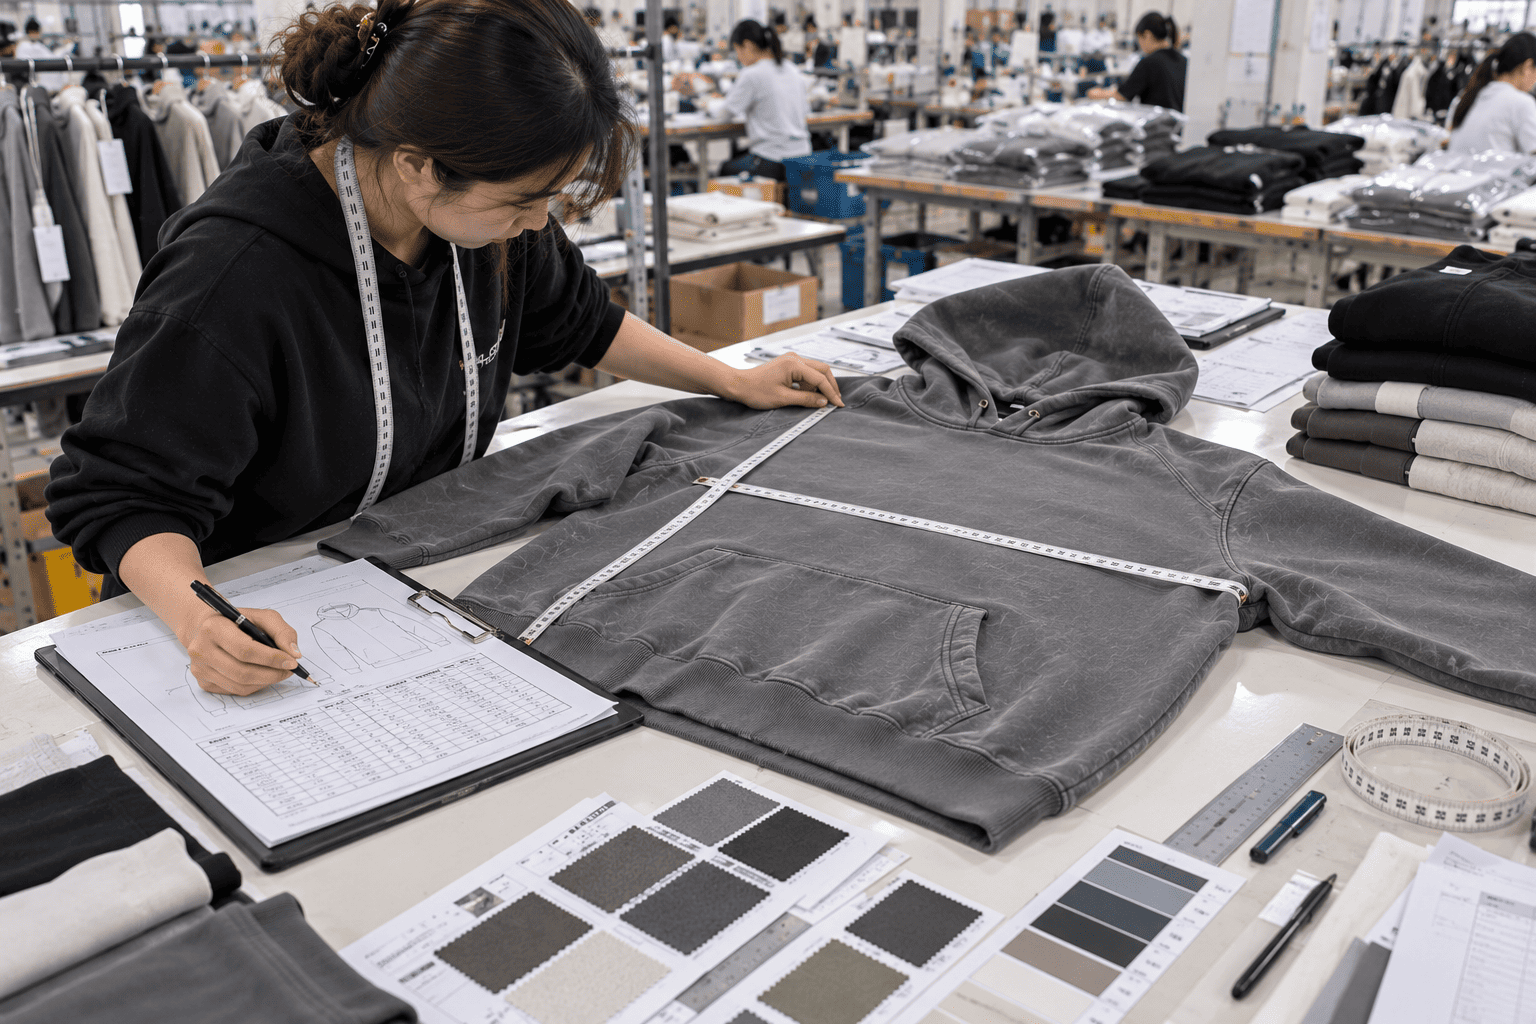
Garment measurements should use clearly defined start and end points, consistent garment positioning, and an agreed method. The same method should be used during sample approval, bulk production, final inspection, and reorders.
There Is an Actual ISO Garment Measurement Standard
ISO 18890:2018[^4] is specifically titled:
Clothing — Standard method of garment measurement.
It defines main garment measurement points and describes methods for measuring garment dimensions.
It also allows additional measurement points to be agreed between the interested parties.[^4]
This is highly relevant to tech packs.
It confirms a principle garment factories already understand:
the number alone is not enough—the POM and method need to be clear.
Example: Chest Measurement
A brand may measure chest:
2 cm below armhole
while another measures:
directly at the underarm seam.
Both systems can work.
But if the brand uses one and the factory uses the other, you may get:
59 cm
vs:
60.5 cm
on exactly the same garment.
Then everyone thinks someone measured incorrectly.
Define Every POM
A tech pack should ideally include:
POM code
- name
- measurement
- tolerance
- method / diagram
For example:
A01 – Half Chest
Measure straight across the garment, 2 cm below the armhole, edge to edge.
Common Garment Methods
| Measurement | Example Method |
|---|---|
| Half chest | Flat across body at defined point below armhole |
| Body length | High point shoulder to bottom hem |
| Shoulder | Shoulder seam to shoulder seam |
| Sleeve | Shoulder seam to cuff edge |
| Waist | Flat across waistband, relaxed |
| Hip | Flat across defined distance below waistband |
| Front rise | Crotch intersection to top waist |
| Inseam | Crotch seam to hem |
These methods can vary by style.
So they should be drawn or written into the tech pack.
Raglan Sleeves Are a Good Example
A normal set-in sleeve can be measured:
shoulder seam → cuff.
But a raglan garment may have no conventional shoulder seam.
So the sleeve may instead be measured from:
center back neck → sleeve edge.
If that distinction is missing, one sleeve measurement can be interpreted two different ways.
Flat Measurements vs Circumference
This also needs to be clear.
If a chart says:
Chest: 60 cm
does that mean:
60 cm flat half chest
or:
120 cm total circumference?
For most factory garment charts, flat measurements are common.
But never assume.
Write it.
Measure Without Stretching Unless the POM Says Otherwise
For a normal chest measurement:
lay the garment naturally.
Do not pull it until the wrinkles disappear.
For a stretch waistband, you may intentionally specify:
- Relaxed
- Stretched
Those are different POM conditions.
Visual Diagrams Are Better Than Long Explanations
A simple garment diagram with:
A — Chest
B — Length
C — Shoulder
D — Sleeve
often prevents more mistakes than a paragraph of text.
That diagram can be reused in:
- Tech pack
- QC sheet
- Size guide
How Does a Factory Use Your Size Chart?
Your garment chart is not something the factory looks at once and forgets.
It is used through multiple stages of production.
The factory uses the size chart during pattern making, sample checking, grading, size-set review, bulk measurement inspection, and repeat orders. The same approved chart should remain the reference unless a new version is formally approved.
1. Pattern Making
The pattern maker uses:
- Target garment measurements
- Fabric
- Fit
- Construction
to create the base pattern.
The paper pattern itself may not measure exactly like the finished garment because sewing and finishing affect the final dimensions.
The goal is:
finished garment reaches approved measurements.
2. Fabric Shrinkage
If the fabric changes after washing, the pattern may need compensation.
This is especially important for:
- Cotton jersey
- French terry
- Fleece
- Linen
- Denim
- Garment-washed pieces
That is why we test the material rather than blindly adding a universal shrinkage percentage.
3. Sample Measurement
When the first sample is finished, the sample is measured against the chart.
For every important POM:
Target
vs.
Actual
For example:
| POM | Target | Sample | Difference |
|---|---|---|---|
| Chest | 59 cm | 59.5 cm | +0.5 |
| Length | 72 cm | 71 cm | -1 |
| Sleeve | 59 cm | 60 cm | +1 |
Then we decide:
Is it within tolerance?
Does the fit still look correct?
4. Pattern Correction
This is important.
If the sample is out of specification, do not simply say:
“Next time sew it smaller.”
The pattern or construction should be corrected so the result is repeatable.
5. Grading
Once the base size is approved, the pattern maker grades the other sizes using the approved size chart.
That is why every size needs real target measurements.
Do not send:
M measurements
and then write:
“Please make standard S–XXL.”
There is no universal "standard" grading that automatically represents your brand.
6. Size Set
A size set checks whether grading behaves correctly across the range.
For example:
S
M
XL
might be produced and checked.
This can identify problems such as:
- XL sleeve too long
- S neck too narrow
- Hip grade too small
before full production.
7. Bulk QC
During bulk production, garments can be measured against:
- Size chart
- Approved tolerances
But measurement tolerance and AQL are two different systems.
This is important.
Tolerance Is Not AQL
If chest target is:
59 cm ±1 cm
that defines whether the measurement itself is in specification.
AQL deals with how a production lot is sampled for acceptance inspection.
The current ISO 2859-1:2026[^6] defines statistical sampling plans indexed by Acceptance Quality Limit for lot-by-lot inspection.[^6]
So:
±1 cm tolerance
and:
AQL 2.5
do not mean the same thing.
AQL does not create your garment measurement tolerance.
The tech pack does.
8. Reorders
Six months later, you reorder the same hoodie.
The factory should reuse:
- Approved pattern
- Latest tech pack
- Latest size chart
- Grading
- Tolerances
unless a change is officially approved.
That is how size M in the second run stays connected to size M in the first run.
How Do You Build a Better Size Chart From Scratch?
If you are a startup brand and have no size chart yet, you do not need to guess everything from zero.
Step 1: Define the Customer
Ask:
Who is this garment for?
- Men's
- Women's
- Unisex
- Youth
- Plus-size / extended-size
- Specific regional customer
Step 2: Choose Body Measurements
Use appropriate body dimensions for the product.
For example:
T-shirt:
- Chest
- Height
Legging:
- Waist
- Hip
- Height / inseam
Step 3: Define the Fit
Is the garment:
- Slim
- Regular
- Relaxed
- Oversized
- Compression
This determines the relationship between body and garment measurements.
Step 4: Build the Base Pattern
Develop one strategic size first.
Do not start by filling an Excel file with six sizes before the base fit is correct.
Step 5: Fit-Test
Put the sample on:
- Fit model
- Mannequin
- Intended wearer
depending on the product.
Check movement as well as standing appearance.
Step 6: Measure the Approved Sample
Once fit is approved, document the final garment measurements.
Step 7: Grade the Range
Create target measurements for every size.
Step 8: Add Tolerances
Assign tolerances by POM.
Step 9: Add POM Diagrams
Make sure every important measurement can be repeated by another person.
Step 10: Lock the Version
Name it clearly.
For example:
Hoodie Size Spec V3 — Approved 13 Oct 2026
Then everyone works from the same document.
Green Flags and Red Flags
| Green flag | Red flag |
|---|---|
| Separates body and garment measurements | Mixes body and garment numbers |
| Defines POMs clearly | “Measure normally” |
| Uses diagrams | Text-only ambiguous chart |
| Sets tolerances by measurement | One huge tolerance everywhere |
| Fits a base size before grading | Grades before fit approval |
| Checks strategic graded sizes | Only checks one size |
| Uses the same method for sample and bulk | Different people measure differently |
| Updates version numbers | Changes live only in WhatsApp |
| Keeps approved specs for reorders | Recreates size chart later |
| Separates tolerance from AQL | Treats AQL as measurement tolerance |
Conclusion
A good size chart is not just:
S, M, L, XL
with numbers underneath.
It is a communication system between:
your customer, your designer, your pattern maker, your factory, and your QC team.
Start by separating:
body measurements
from:
garment measurements.
The body chart answers:
Who should wear this size?
The garment chart answers:
What should the finished garment actually measure?
Then choose the POMs that control the fit.
A hoodie may need:
- Chest
- Length
- Shoulder
- Sleeve
- Hem
- Hood
A trouser may need:
- Waist
- Hip
- Rise
- Thigh
- Inseam
- Leg opening
Define how every POM is measured.
Do not assume:
“chest is obvious.”
Write and draw the method.
Then perfect the base fit.
Grade the rest of the size range from the approved design.
Do not use the same increment blindly for every measurement.
Set tolerances that are:
tight enough to protect fit
but:
realistic enough for manufacturing.
And remember:
A measurement tolerance is not AQL.
One controls the acceptable dimension of the garment.
The other is part of a statistical sampling system used during lot inspection.
Finally, keep the approved size chart with the pattern.
When you reorder six months later, the factory should not need to ask:
“What was your size M again?”
The answer should already be documented.
Because a good size chart does more than tell a customer what size to buy.
It tells the factory how to make the same fit again.
Footnotes & References
[^1]: International Organization for Standardization — ISO 8559-1:2017, Size Designation of Clothes — Part 1: Anthropometric Definitions for Body Measurement. Defines anthropometric measurements used as a basis for body-measurement databases, population size and shape profiles, garment development, and corresponding fit mannequins. The standard was reviewed and confirmed in 2026 and remains current.
https://www.iso.org/standard/61686.html
[^2]: International Organization for Standardization — ISO 8559-2:2025, Size Designation of Clothes — Part 2: Primary and Secondary Dimension Indicators. The current 2025 edition specifies primary and secondary body dimensions for clothing size designation and establishes a sizing system based on body measurements defined under ISO 8559-1.
https://www.iso.org/standard/85590.html
[^3]: International Organization for Standardization — ISO 8559-3:2018, Size Designation of Clothes — Part 3: Methodology for the Creation of Body Measurement Tables and Intervals. Describes principles for establishing body-measurement tables and size intervals for ready-to-wear garments and is intended to support development of more accurate, well-fitting clothing for defined population groups.
https://www.iso.org/standard/67334.html
[^4]: International Organization for Standardization — ISO 18890:2018, Clothing — Standard Method of Garment Measurement. Defines major garment measurement points and describes methods used to measure finished-garment dimensions. The standard also allows additional measurement points to be agreed between interested parties. It was reviewed and confirmed in 2024 and remains current.
https://www.iso.org/standard/63693.html
[^5]: International Organization for Standardization — ISO 5077:2007, Textiles — Determination of Dimensional Change in Washing and Drying. Specifies a method for determining dimensional changes in fabrics, garments, and other textile articles after defined washing and drying procedures. The standard was reviewed and confirmed in 2022 and remains current.
https://www.iso.org/standard/41877.html
[^6]: International Organization for Standardization — ISO 2859-1:2026, Sampling Procedures for Inspection by Attributes — Part 1. The current 2026 edition defines acceptance-sampling schemes indexed by Acceptance Quality Limit (AQL) for lot-by-lot inspection. AQL is part of a statistical inspection system and is separate from the measurement tolerances defined in a garment specification.
https://www.iso.org/standard/2859-1